Fair Value Gap Pullback — Exact 3-Candle Rules, Fill Math, and Three Worked Cases
The imbalance concept without the folklore: an exact three-candle definition, a size threshold that kills micro-gaps, fill fractions tracked bar by bar, and three worked cases with every number computed.
Fair value gaps have become the most over-claimed pattern in price action: screenshots of "unfilled FVGs" with confident fill-rate statistics attached and no dataset behind them. This guide keeps the useful part — a three-candle displacement leaves an untouched price band, and pullbacks into that band are structurally defined entries — and makes the whole thing testable: an exact definition, a minimum size threshold, fill fractions computed bar by bar, three worked cases with full arithmetic, and a complete Python implementation that measures fills on your own data instead of repeating a number from a screenshot.
1. What a Fair Value Gap Is — Exact Definition
Forget the narrative for a moment. Mechanically, a bullish FVG is a three-candle pattern with one inequality:
$$\text{candle 1 high} < \text{candle 3 low}$$
When that inequality holds and the middle candle is green, the price band from candle 1's high up to candle 3's low was crossed so quickly that no trade occurred at those prices in between — the band is the gap. In the worked data below, candle 1 (B6) has a high of 1.08570 and candle 3 (B8) has a low of 1.08730, so the gap is the band [1.08570, 1.08730] — 16.0 pips that price passed through in two bars without touching.
Why would price return to such a band? The observable answers are mundane. The move that created the gap was fast enough that some participants did not transact inside it; when price returns, those orders cluster there. In market-microstructure terms, short-horizon price changes are driven mainly by order flow imbalance, and a gap is simply the visible trace of a strong imbalance. What is not observable — and what this guide never claims — is that a specific institutional actor "left orders" in the gap. The definition above needs none of that story, and unlike the story, it can be coded and falsified.
Two properties make the mechanical definition airtight. First, it is symmetric and unambiguous: candle 1's high and candle 3's low are single prices; there is no judgment about which candle "created" the gap. Second, it is testable in both directions: either the band was untouched (the inequality holds) or it was not. There is no third case, which is exactly what a rule set needs.
2. The Minimum Gap Threshold — Why Micro-Gaps Are Spread Food
A one-pip gap satisfies the inequality above and is worthless as a setup: the spread alone is wider than the zone, the stop has to sit at least a spread away, and the economics never close. So the rule set adds a size floor:
$$\text{gap size} = \text{candle 3 low} - \text{candle 1 high} \ \ge\ m \times \text{ATR}_{14}\ (\text{at candle 3}), \qquad m = 0.25\ \text{by default}$$
The default m = 0.25 is a convention, not a discovery — the implementation tests m ∈ {0.15, 0.25, 0.40} in the sensitivity grid. In the worked data the gap is 16.0 pips against a threshold of 5.12 pips (0.25 × 20.50): comfortably valid. In the third worked case, a 4.0-pip gap fails a 4.70-pip threshold and the setup is skipped entirely — and the article shows what that skip cost, because honesty about thresholds requires showing what they filter out, not only what they catch.
There is a second, quieter threshold in the rule set: the trigger. A gap alone is not a trade; the entry requires a bullish engulfing bar whose close lands at or above the gap low after the gap has been touched. The threshold structure — size, then touch, then trigger, then close-through invalidation — is what separates this from "buy every imbalance you can draw."
3. The Exact Rules
FVG Pullback — Complete Rule Set (long side)
- Formation: candle 1 high < candle 3 low, middle candle green. Zone = [candle 1 high, candle 3 low].
- Size floor: gap size ≥ 0.25 × ATR14 at candle 3. Smaller gaps are ignored.
- Fill tracking: after formation, track the lowest low. Fill fraction = (gap top − lowest low) ÷ gap size, clamped to [0, 1]. Partial < 1.0; full = 1.0.
- Invalidation: a close below the gap low (close-through) kills the FVG permanently.
- Trigger: the first bullish engulfing bar that touches the gap (low ≤ gap top) with a close at or above the gap low.
- Entry: at the trigger bar's close.
- Stop: gap low − buffer, buffer = max(2 pips, 0.15 × ATR14 at the trigger).
- Targets: impulse high = highest high from candle 2 through the bar before the trigger. TP1 = impulse high; TP2 = impulse high + 0.5 × (impulse high − gap low); TP3 = impulse high + 1.0 × (same). Partials 50/30/20.
Notice what the targets are anchored to: the impulse high is the highest price the move actually printed before the pullback — not a projection, not a Fibonacci level, but a price that already exists on the chart. The projections (TP2, TP3) only start beyond it, and the 50% partial at TP1 books profit at the level the market already proved it could reach.
4. Worked Case 1 — Valid: Every Number Computed
Synthetic labeled data, EURUSD-like H1, 1 pip = 0.0001. Every value is computed by the module in Section 11, which asserts each claim. The structural bars:
| Bar | Open | High | Low | Close | Role |
|---|---|---|---|---|---|
| B6 | 1.08520 | 1.08570 | 1.08380 | 1.08420 | Candle 1 (red) — high 1.08570 |
| B7 | 1.08420 | 1.08800 | 1.08400 | 1.08780 | Candle 2 (green displacement) |
| B8 | 1.08780 | 1.08920 | 1.08730 | 1.08900 | Candle 3 — low 1.08730; gap = [1.08570, 1.08730] |
| B10 | 1.09040 | 1.09120 | 1.08980 | 1.09000 | Impulse high 1.09120 |
| B12 | 1.08880 | 1.08900 | 1.08600 | 1.08630 | Fill 81.25% |
| B13 | 1.08630 | 1.08650 | 1.08590 | 1.08600 | Fill 87.5% |
| B14 | 1.08595 | 1.08750 | 1.08580 | 1.08720 | Trigger: fill 93.75%, engulfing close 1.08720 |
The trigger check in full: prior bar B13 is red (close 1.08600 < open 1.08630). Bar B14 is green (close 1.08720 > open 1.08595). Engulfing requires open of B14 ≤ close of B13: \(1.08595 \le 1.08600\) ✓. And close of B14 ≥ open of B13: \(1.08720 \ge 1.08630\) ✓. The trigger bar's low (1.08580) touches the gap (below the 1.08730 top) ✓, and the close is above the gap low (1.08570) ✓. All conditions hold.
The trade arithmetic:
Gap = [1.08570, 1.08730], size 16.0 pips
ATR14 at formation (B8) = 20.50 pips; 0.25 x 20.50 = 5.12 pips -> valid

Fill path: B12 low 1.08600 -> 81.25%
           B13 low 1.08590 -> 87.5%
           B14 low 1.08580 -> 93.75%  (trigger bar)

Impulse high = max(B7..B13 highs) = 1.09120
ATR14 at trigger = 20.43 pips; buffer = max(2, 3.06) = 3.06 pips
Stop = 1.08570 - 0.000306 = 1.08539
Entry = 1.08720 (trigger close)
Risk = 1.08720 - 1.08539 = 0.001806 = 18.06 pips

TP1 = 1.09120 : 40.0 pips = 2.21R  (hit at B17)
TP2 = 1.09395 : 67.5 pips = 3.74R  (hit at B19)
TP3 = 1.09670 : 95.0 pips = 5.26R  (hit at B22)

Blended 50/30/20 = 3.28R before costs, 3.22R after 1-pip spread

Sizing ($10,000, 1% risk, EURUSD):
  cost-adjusted risk per lot = (18.06 + 1.0) x $10 = $190.60
  lots = floor(100 / 190.60 / 0.01) x 0.01 = 0.52
  money at risk = 0.52 x $190.60 = $99.13
  P&L at blended: 3.22 x $99.13 = +$319.67
Three observations, all arithmetic rather than opinion. The fill fraction matters: at the trigger, price had consumed 93.75% of the gap — a deep partial fill, one hair from full. The gap held on the last 0.5 pip of depth (the B14 low of 1.08580 versus the gap low of 1.08570), which is precisely the kind of boundary case that makes the next section necessary. The stop is wide relative to the gap (18.06 pips against a 16.0-pip gap) because the entry fires near the gap top and the buffer sits below the gap low — the geometry of every gap trade. And the reward ladder is anchored to a real price: TP1 is 1.09120, the high the market already printed.
5. Worked Case 2 — Failed: the Trigger That Went Through
Same gap, same trigger, same entry and stop — different continuation:
| Bar | Open | High | Low | Close | Note |
|---|---|---|---|---|---|
| B15f | 1.08720 | 1.08740 | 1.08620 | 1.08640 | Stall |
| B16f | 1.08640 | 1.08660 | 1.08560 | 1.08580 | Sliding through the gap |
| B17f | 1.08580 | 1.08600 | 1.08550 | 1.08570 | On the gap low |
| B18f | 1.08570 | 1.08590 | 1.08480 | 1.08500 | Low 1.08480 ≤ stop 1.08539 → filled |
The arithmetic of the loss: stop fill at 1.08539, entry 1.08720, so the realized loss is the full 18.06-pip risk plus the 1-pip spread — −1.06R, which at 0.52 lots is −$104.62. The close at 1.08500 is below the gap low (1.08570), confirming close-through: the gap is dead, and the rule set forbids re-entry on it even if price later bounces. Note the asymmetry with the valid case: the valid version's deepest wick stopped 0.5 pip above the gap low; the failed version closed 7 pips below it. The boundary between "deep partial fill that held" and "close-through that failed" is thin — which is exactly why the rule is a close, not a wick.
The recovery math: the account stands at $9,895.38; recovering requires +1.06% — one risk unit plus costs. At 5% risk the same event costs $523 and requires +5.5% to recover.
6. Worked Case 3 — Ambiguous: the Gap That Was Too Small
The third case tests the size threshold itself. A formation produces a gap of 4.0 pips — real, untouched by the inequality test, and rejected by the size floor:
Gap = [1.08570, 1.08610], size = 4.0 pips
Threshold = 0.25 x ATR14 at candle 3 = 0.25 x 18.79 = 4.70 pips
4.0 < 4.70 -> the gap is skipped by the default rules.

Price then retraced into the gap and bounced (fill path 50% -> 75% -> 87.5%)
with a valid engulfing trigger at B14s. Counterfactual (threshold loosened
to 0.10 x ATR): entry 1.08710, stop 1.08544, risk 16.63 pips,
outcome all targets, realized +2.43R - a trade the default rule skipped.
This is the honest cost of the size floor, stated with numbers instead of hidden: a 4.70-pip threshold skipped a 4.0-pip gap that would have worked. Now the discipline argument, which is mechanical rather than motivational. If you lower the threshold after every miss, you are fitting the rule to the last trade. The correct procedure: log the case; if the looser threshold (0.10 or 0.15) accumulates a better sample over fifty setups — higher total R after costs, consistent across walk-forward blocks — adopt it prospectively. The implementation exists precisely to produce that sample. What it will likely show on most instruments is what the sensitivity grid in Section 10 shows on the demo data: the loose-threshold rows carry negative expectancy, because micro-gaps are where the spread eats you. The 4.0-pip gap that worked here is one sample; the threshold is a statement about the distribution.
7. Partial vs Full Fills — the Hypothesis
The lore says partial fills are better entries than full fills, because a full fill means price consumed the entire imbalance and may keep going. That claim is testable, and the implementation tests it directly by bucketing every trade by its fill fraction at the trigger:
H1 (our own, falsifiable): Entries where the gap was partially filled (fill < 100% at the trigger) produce higher continuation expectancy than entries where the gap was fully filled (fill = 100%), after costs, consistently across walk-forward blocks. Falsification: if full-fill entries match or beat partial-fill entries out-of-sample, the fill-depth distinction is dropped from the setup description.
One nuance the bucketing makes visible: the valid case's trigger was a 93.75% fill — deep partial. The difference between a 93.75% fill and a 100% fill is half a pip, yet the lore treats them as different categories. The bucket boundary is a convention; what matters is whether the distribution actually shifts at the boundary. The module reports both buckets' expectancy, win rates and samples; your data answers the question.
8. The Evidence Question — What the Harness Must Show
The burden of proof for any threshold-based pattern is double: the pattern must exist often enough to trade, and the thresholds must improve the outcomes. The synthetic demo in Section 10 answers neither question for real markets — it cannot, by construction — but it demonstrates both machines. On the seeded random walk, three-candle gaps of tradeable size barely exist: the grid's loose row (0.15×ATR) contains a single full-fill trade that lost, the 0.25 and 0.40 rows contain no trades at all, and the out-of-sample blocks contain no qualified setups. That is the correct output for data with no displacement structure. A detector that manufactured setups from a random walk would be broken; this one reports the emptiness.
9. Risk Math — the Complete Arithmetic
Position sizing with costs, for the Case 1 trade:
$$\text{Lots}=\left\lfloor\frac{E \times \text{risk\%}}{(S + C)\times V}\Big/0.01\right\rfloor \times 0.01$$
with equity \(E = \$10{,}000\), risk 1%, stop \(S = 18.06\) pips, cost \(C = 1\) pip, pip value \(V = \$10\) per lot: \(100 / (19.06 \times 10) = 0.5246\), floored to 0.52 lots — risking $99.13 including the spread. The outcome table for the three cases:
| Outcome | R | P&L |
|---|---|---|
| Full stop (Case 2) | −1.06R | −$104.62 |
| TP1 only, then breakeven (50% booked) | +1.05R | +$104.09 |
| TP1 + TP2 (80% booked, runner stopped at entry) | +2.10R | +$208.17 |
| All three targets (Case 1) | +3.22R | +$319.67 |
And expectancy:
$$E_R = p_{win}\cdot W_R - (1-p_{win})\cdot L_R$$
Illustrative inputs (hypothetical, NOT a claim):
  p = 45%   W = 2.5R   L = 1.0R
  Expectancy = 0.45 x 2.5 - 0.55 x 1.0 = +0.575R per trade

Sensitivity:
  p = 35%:  0.35 x 2.5 - 0.65 x 1.0 = +0.225R  (alive)
  p = 25%:  0.25 x 2.5 - 0.75 x 1.0 = -0.125R  (dead)

Breakeven win rate at W = 2.5R: p* = 1/(1+2.5) = 28.6%
The wider blended average (2.5R here versus 2.0R in the order block guide) reflects the deeper reward ladder in this setup — but a wider W with a lower win rate is the same business only if the sample confirms it. The breakeven at 28.6% is the number to beat, and only logged trades can tell you whether you are on the right side of it. The drawdown arithmetic stays identical: ten straight losses at 1% cost 9.6%; at 5% they cost 40% and require +67% to recover.
10. Validation Protocol
The module implements the series protocol: chronological 60/20/20 split; the size threshold and buffer chosen on train only; the frozen configuration evaluated on validation and test blocks; a sensitivity grid over m ∈ {0.15, 0.25, 0.40} × buffer ∈ {0.10, 0.15, 0.25} × ATR; the fill-depth hypothesis test (partial vs full buckets) on the full sample; costs charged per trade; entries at the trigger close; FVG detection uses only completed candles (no repainting). On the seeded synthetic demo the harness reports exactly what it must — the loose-threshold row (0.15×ATR) carries a single losing trade (−1.05R), the 0.25 and 0.40 rows are empty, the out-of-sample blocks contain no qualified setups, and the fill buckets are near-empty. That is the honest output for a random walk: no structure, no trades, no edge. The harness's value is that it will say the same thing about your data if the pattern is not there — and something different if it is.
11. The Complete Implementation
The module below imports the shared library published with the Fibonacci guide (keep both files in the same folder). It contains the FVG detector, the setup finder with fill tracking, the three worked cases as literal OHLC arrays with assertions verifying every number quoted above, and the full validation harness with the fill-depth bucketing. Run it three ways:
python fvg_pullback.py examples    # verify the three worked cases
python fvg_pullback.py validate    # synthetic walk-forward + fill-bucket demo
python fvg_pullback.py csv GBPUSD_H1.csv   # the real test: your data
#!/usr/bin/env python3
"""
fvg_pullback.py - Fair value gap pullback entry: reference implementation.

Companion code for the AlgoSpecial guide "Fair Value Gap Pullback"
(algospecial.com/blogs/fair-value-gap-pullback). Imports the shared library
published with the Fibonacci guide (fib_pullback.py) - keep both files in
the same folder. Pure standard library, Python 3.7+.

OPERATIONAL DEFINITION (ours - stated so it can be tested)
----------------------------------------------------------
A "fair value gap" (FVG) in this rule set is a three-candle price
imbalance, defined mechanically. No intent claims are made:

- Bullish FVG: candle 1 high < candle 3 low. The gap zone is
  [candle1.high, candle3.low]; candle 2 must be green (the displacement
  candle). Gap size = candle3.low - candle1.high.
- Minimum size: gap >= min_gap_atr * ATR14 at candle 3 (default 0.25).
  This removes micro-gaps that live inside the spread.
- Fill tracking: after formation, track the lowest low. Fill fraction =
  (gap top - lowest low) / gap size, clamped to [0, 1]. A "partial fill"
  is fill < 1.0; a "full fill" is fill = 1.0 (price traded through the
  entire gap).
- Invalidation: a close below the gap low (close-through) kills the FVG.
- Entry: the first bullish engulfing bar that touches the gap
  (low <= gap top) with a close at or above the gap low.
- Stop: gap low - buffer, buffer = max(2 pips, 0.15 * ATR14).
- Targets: impulse_high = highest high from candle 2 through the bar
  before the trigger. TP1 = impulse_high; TP2 = impulse_high + 0.5 x
  (impulse_high - gap low); TP3 = impulse_high + 1.0 x (same).

WHAT THIS FILE CONTAINS
-----------------------
1. The FVG detector, setup finder (with fill tracking) and simulation
   (reusing the shared simulator with identical partials and costs).
2. The three worked cases from the article as literal OHLC arrays with
   assertions verifying every claim (gap bounds, size threshold, fill
   fractions, trigger condition, stop fill, close-through invalidation).
3. A validation harness: 60/20/20 split, walk-forward, the fill-depth
   hypothesis test (partial vs full fills - the article's H1), and a
   sensitivity grid over the minimum gap size and the buffer.

USAGE
-----
    python fvg_pullback.py examples    # the three worked cases
    python fvg_pullback.py validate    # synthetic harness demo
    python fvg_pullback.py csv GBPUSD_H1.csv
"""

from __future__ import annotations

import sys
from dataclasses import dataclass
from typing import List, Optional, Sequence, Tuple

from fib_pullback import (Bar, PIP, pips, atr_sma, is_bullish_engulfing,
                          simulate_long, metrics, synthetic_bars,
                          load_mt5_csv, size_position)


@dataclass
class FVG:
    i1: int          # candle 1
    i3: int          # candle 3
    gap_lo: float
    gap_hi: float
    size: float
    atr_at_form: float


@dataclass
class FVGSetup:
    fvg: FVG
    entry_idx: int
    entry: float
    stop: float
    tp1: float
    tp2: float
    tp3: float
    fill: float      # fill fraction at the trigger bar
    impulse_high: float

    @property
    def risk(self) -> float:
        return self.entry - self.stop


def find_fvgs(bars: Sequence[Bar], min_gap_atr: float = 0.25,
              period: int = 14) -> List[FVG]:
    """Three-candle bullish FVGs meeting the minimum size."""
    out: List[FVG] = []
    for i in range(1, len(bars) - 1):
        b1, b2, b3 = bars[i - 1], bars[i], bars[i + 1]
        if not (b2.c > b2.o):
            continue
        if b1.h < b3.l:
            gap_lo, gap_hi = b1.h, b3.l
            a = atr_sma(bars, i + 1, period)
            if a is None:
                continue
            if gap_hi - gap_lo >= min_gap_atr * a:
                out.append(FVG(i - 1, i + 1, gap_lo, gap_hi, gap_hi - gap_lo, a))
    return out


def find_fvg_setup(bars: Sequence[Bar], fvg: FVG, buffer_mult: float = 0.15,
                   period: int = 14) -> Optional[FVGSetup]:
    """First engulfing trigger at the gap; close-through kills it."""
    min_low = fvg.gap_hi
    for i in range(fvg.i3 + 1, len(bars)):
        bar, prev = bars[i], bars[i - 1]
        if bar.c < fvg.gap_lo:           # close-through invalidation
            return None
        min_low = min(min_low, bar.l)
        if bar.l <= fvg.gap_hi and is_bullish_engulfing(prev, bar) and bar.c >= fvg.gap_lo:
            a = atr_sma(bars, i, period)
            if a is None:
                continue
            buffer = max(2 * PIP, buffer_mult * a)
            stop = fvg.gap_lo - buffer
            if stop >= bar.c:
                continue
            impulse_high = max(x.h for x in bars[fvg.i1 + 1:i])
            if impulse_high <= fvg.gap_hi:
                impulse_high = max(x.h for x in bars[fvg.i1:i + 1])
            span = impulse_high - fvg.gap_lo
            fill = min(1.0, (fvg.gap_hi - min_low) / fvg.size)
            return FVGSetup(fvg, i, bar.c, stop, impulse_high,
                            impulse_high + 0.5 * span, impulse_high + span,
                            fill, impulse_high)
    return None


def collect_fvg_results(bars: Sequence[Bar], min_gap_atr: float = 0.25,
                        buffer_mult: float = 0.15, spread_pips: float = 1.0,
                        start_idx: int = 0) -> List[Tuple[FVGSetup, object]]:
    """All trades with their setups (for fill-depth bucketing)."""
    out: List[Tuple[FVGSetup, object]] = []
    last_exit = -1
    for fvg in find_fvgs(bars, min_gap_atr):
        if fvg.i3 < start_idx or fvg.i3 <= last_exit:
            continue
        setup = find_fvg_setup(bars, fvg, buffer_mult)
        if setup is None:
            continue
        res = simulate_long(bars, setup, spread_pips)
        out.append((setup, res))
        last_exit = res.exit_idx
    return out


def run_fvg_strategy(bars: Sequence[Bar], min_gap_atr: float = 0.25,
                     buffer_mult: float = 0.15, spread_pips: float = 1.0,
                     start_idx: int = 0) -> List:
    return [res for (_, res) in collect_fvg_results(bars, min_gap_atr, buffer_mult,
                                                    spread_pips, start_idx)]


# --------------------------------------------------------------------------
# The three worked cases (literal arrays; assertions verify the article)
# --------------------------------------------------------------------------

PRE = [
    Bar(1.08100, 1.08260, 1.08080, 1.08240),  # B-5
    Bar(1.08240, 1.08400, 1.08220, 1.08380),  # B-4
    Bar(1.08380, 1.08540, 1.08360, 1.08520),  # B-3
    Bar(1.08520, 1.08680, 1.08500, 1.08660),  # B-2
    Bar(1.08660, 1.08820, 1.08640, 1.08800),  # B-1
    Bar(1.08800, 1.08960, 1.08780, 1.08920),  # B0
]
CONTEXT = [
    Bar(1.08920, 1.09080, 1.08900, 1.09060),  # B1
    Bar(1.09060, 1.09160, 1.09020, 1.09040),  # B2
    Bar(1.09040, 1.09060, 1.08860, 1.08890),  # B3
    Bar(1.08890, 1.08910, 1.08620, 1.08660),  # B4
    Bar(1.08660, 1.08680, 1.08480, 1.08520),  # B5
]
FORM = [
    Bar(1.08520, 1.08570, 1.08380, 1.08420),  # B6  candle 1 (high 1.08570)
    Bar(1.08420, 1.08800, 1.08400, 1.08780),  # B7  candle 2 (displacement)
    Bar(1.08780, 1.08920, 1.08730, 1.08900),  # B8  candle 3 (low 1.08730)
]
RETRACE = [
    Bar(1.08900, 1.09080, 1.08860, 1.09040),  # B9
    Bar(1.09040, 1.09120, 1.08980, 1.09000),  # B10 impulse high 1.09120
    Bar(1.09000, 1.09020, 1.08840, 1.08880),  # B11
    Bar(1.08880, 1.08900, 1.08600, 1.08630),  # B12 fill 81.25%
    Bar(1.08630, 1.08650, 1.08590, 1.08600),  # B13 fill 87.5%
]
TRIGGER = Bar(1.08595, 1.08750, 1.08580, 1.08720)  # B14 fill 93.75%
VALID_CONT = [
    Bar(1.08720, 1.08880, 1.08690, 1.08850),
    Bar(1.08850, 1.09020, 1.08810, 1.08990),
    Bar(1.08990, 1.09150, 1.08950, 1.09120),  # TP1 1.09120 hit
    Bar(1.09120, 1.09280, 1.09080, 1.09250),
    Bar(1.09250, 1.09420, 1.09210, 1.09390),  # TP2 1.09395 hit
    Bar(1.09390, 1.09540, 1.09350, 1.09510),
    Bar(1.09510, 1.09680, 1.09470, 1.09650),
    Bar(1.09650, 1.09720, 1.09610, 1.09690),  # TP3 1.09670 hit
]
FAILED_CONT = [
    Bar(1.08720, 1.08740, 1.08620, 1.08640),
    Bar(1.08640, 1.08660, 1.08560, 1.08580),
    Bar(1.08580, 1.08600, 1.08550, 1.08570),
    Bar(1.08570, 1.08590, 1.08480, 1.08500),  # low 1.08480 <= stop -> filled
]
SMALL_FORM = [
    Bar(1.08520, 1.08570, 1.08480, 1.08500),  # B6s candle 1 (high 1.08570)
    Bar(1.08500, 1.08720, 1.08480, 1.08700),  # B7s candle 2
    Bar(1.08700, 1.08820, 1.08610, 1.08800),  # B8s candle 3 -> gap 4.0 pips
]
AMBIG_CONT = [
    Bar(1.08800, 1.08920, 1.08780, 1.08900),  # B9s
    Bar(1.08900, 1.08980, 1.08860, 1.08940),  # B10s
    Bar(1.08940, 1.08960, 1.08700, 1.08740),  # B11s
    Bar(1.08740, 1.08760, 1.08590, 1.08620),  # B12s fill 50%
    Bar(1.08620, 1.08640, 1.08580, 1.08600),  # B13s fill 75%
    Bar(1.08590, 1.08730, 1.08575, 1.08710),  # B14s trigger
    Bar(1.08710, 1.08860, 1.08680, 1.08830),  # B15s
    Bar(1.08830, 1.08990, 1.08790, 1.08960),  # B16s TP1 1.08980 hit
    Bar(1.08960, 1.09080, 1.08920, 1.09050),  # B17s
    Bar(1.09050, 1.09190, 1.09010, 1.09160),  # B18s TP2 1.09185 hit
    Bar(1.09160, 1.09320, 1.09120, 1.09290),  # B19s
    Bar(1.09290, 1.09410, 1.09250, 1.09380),  # B20s TP3 1.09390 hit
]


def verify_worked_cases() -> None:
    valid = PRE + CONTEXT + FORM + RETRACE + [TRIGGER] + VALID_CONT
    failed = PRE + CONTEXT + FORM + RETRACE + [TRIGGER] + FAILED_CONT
    ambig = PRE + CONTEXT + SMALL_FORM + AMBIG_CONT

    fvgs = find_fvgs(valid)
    assert fvgs and fvgs[0].gap_lo == 1.08570 and fvgs[0].gap_hi == 1.08730
    assert abs(fvgs[0].size - 0.00160) < 1e-12
    assert fvgs[0].size >= 0.25 * fvgs[0].atr_at_form

    setup = find_fvg_setup(valid, fvgs[0])
    assert setup is not None and setup.entry_idx == 19
    assert abs(setup.entry - 1.08720) < 1e-12
    assert abs(setup.fill - 0.9375) < 1e-9, "fill at trigger must be 93.75%%"
    assert abs(setup.impulse_high - 1.09120) < 1e-12
    res_v = simulate_long(valid, setup, spread_pips=1.0)
    assert res_v.outcome == "all_targets" and len(res_v.tp_hits) == 3

    setup_f = find_fvg_setup(failed, fvgs[0])
    assert setup_f is not None
    res_f = simulate_long(failed, setup_f, spread_pips=1.0)
    assert res_f.outcome == "stop"

    gaps = find_fvgs(ambig)
    assert all(abs(g.size - 0.00040) > 1e-9 for g in gaps), \
        "the 4.0-pip gap must fail the 0.25xATR threshold"
    assert len(run_fvg_strategy(ambig, 0.25)) == 0, "no trades by default rules"
    variant = run_fvg_strategy(ambig, 0.10)
    assert len(variant) == 1 and variant[0].outcome == "all_targets"


def print_worked_cases() -> None:
    valid = PRE + CONTEXT + FORM + RETRACE + [TRIGGER] + VALID_CONT
    failed = PRE + CONTEXT + FORM + RETRACE + [TRIGGER] + FAILED_CONT
    ambig = PRE + CONTEXT + SMALL_FORM + AMBIG_CONT

    fvg = find_fvgs(valid)[0]
    setup = find_fvg_setup(valid, fvg)
    a_entry = atr_sma(valid, setup.entry_idx)
    buffer = max(2 * PIP, 0.15 * a_entry)

    print("=" * 66)
    print("WORKED CASE 1 - VALID (1 pip = 0.0001)")
    print("=" * 66)
    print("Candle 1 B6 high = %.5f ; candle 3 B8 low = %.5f" % (fvg.gap_hi - fvg.size, fvg.gap_hi))
    print("Gap = [%.5f, %.5f], size = %.1f pips" % (fvg.gap_lo, fvg.gap_hi, pips(fvg.size)))
    print("ATR14 at formation = %.2f pips; min gap 0.25 x ATR = %.2f pips -> valid"
          % (pips(fvg.atr_at_form), pips(0.25 * fvg.atr_at_form)))
    print("Fill path: B12 -> 81.25%%, B13 -> 87.5%%, trigger B14 -> %.2f%%"
          % (100 * setup.fill))
    print("Impulse high (B7..B13 max) = %.5f" % setup.impulse_high)
    print("ATR14 at trigger = %.2f pips; buffer = %.2f pips" % (pips(a_entry), pips(buffer)))
    print("Trigger B14: engulfing close %.5f" % setup.entry)
    print("Stop = gap low - buffer = %.5f" % setup.stop)
    print("Risk = %.2f pips" % pips(setup.risk))
    for name, tp in (("TP1", setup.tp1), ("TP2", setup.tp2), ("TP3", setup.tp3)):
        print("%s = %.5f : %.1f pips = %.2fR" % (name, tp, pips(tp - setup.entry),
                                                 pips(tp - setup.entry) / pips(setup.risk)))
    res = simulate_long(valid, setup, spread_pips=1.0)
    blended = 0.5 * pips(setup.tp1 - setup.entry) / pips(setup.risk) + \
              0.3 * pips(setup.tp2 - setup.entry) / pips(setup.risk) + \
              0.2 * pips(setup.tp3 - setup.entry) / pips(setup.risk)
    print("Blended 50/30/20 = %.2fR before costs, %.2fR after 1-pip spread"
          % (blended, res.realized_r))
    lots, risk_money = size_position(10000.0, 1.0, pips(setup.risk))
    print("Sizing: lots = %.2f; risk+cost = $%.2f; P&L = $%.2f"
          % (lots, risk_money, res.realized_r * risk_money))
    print()

    print("=" * 66)
    print("WORKED CASE 2 - FAILED (trigger, then close-through)")
    print("=" * 66)
    setup_f = find_fvg_setup(failed, fvg)
    res_f = simulate_long(failed, setup_f, spread_pips=1.0)
    print("Same entry %.5f, stop %.5f, risk %.2f pips"
          % (setup_f.entry, setup_f.stop, pips(setup_f.risk)))
    print("B18f low 1.08480 <= stop %.5f -> filled at stop" % setup_f.stop)
    print("B18f close 1.08500 < gap low 1.08570 -> close-through confirmed")
    print("Outcome: %s at bar %d; realized %.2fR; P&L $%.2f"
          % (res_f.outcome, res_f.exit_idx, res_f.realized_r, res_f.realized_r * risk_money))
    print()

    print("=" * 66)
    print("WORKED CASE 3 - AMBIGUOUS (gap below the size threshold)")
    print("=" * 66)
    gaps = find_fvgs(ambig)
    assert all(abs(g.size - 0.00040) > 1e-9 for g in gaps)
    variant = run_fvg_strategy(ambig, 0.10)
    v_setup = collect_fvg_results(ambig, 0.10)[0][0]
    print("Gap [1.08570, 1.08610] = 4.0 pips vs threshold 0.25 x %.2f = %.2f pips"
          % (pips(v_setup.fvg.atr_at_form), pips(0.25 * v_setup.fvg.atr_at_form)))
    print("Default rules: skipped. Price retraced into it and bounced:")
    print("Variant (min gap 0.10 x ATR): entry %.5f, stop %.5f, risk %.2f pips"
          % (v_setup.entry, v_setup.stop, pips(v_setup.risk)))
    print("Counterfactual result: %s; realized %.2fR" % (variant[0].outcome, variant[0].realized_r))
    print()


# --------------------------------------------------------------------------
# Validation harness
# --------------------------------------------------------------------------

def walk_forward_report(bars: Sequence[Bar]) -> None:
    n = len(bars)
    i60, i80 = int(n * 0.6), int(n * 0.8)
    train, val, test = bars[:i60], bars[i60:i80], bars[i80:]
    print("=" * 66)
    print("VALIDATION (synthetic bars, seed 7) - machinery demo only")
    print("=" * 66)
    print("Split: train %d, validation %d, test %d bars" % (len(train), len(val), len(test)))

    print("\nSensitivity grid on TRAIN (expectancy R/trade):")
    print("%-12s" % "min_gap_atr", end="")
    for b in (0.10, 0.15, 0.25):
        print("buffer=%.2f " % b, end="")
    print()
    best = (None, -999.0)
    for mg in (0.15, 0.25, 0.40):
        print("%-12.2f" % mg, end="")
        for bm in (0.10, 0.15, 0.25):
            m = metrics(run_fvg_strategy(train, mg, bm))
            e = m.get("expectancy_r", 0.0)
            if e > best[1]:
                best = ((mg, bm), e)
            print("%9.3f " % e, end="")
        print()
    chosen = best[0] if best[0] else (0.25, 0.15)
    print("Chosen on train: min_gap_atr=%.2f buffer=%.2f" % chosen)

    for name, seg in (("validation", val), ("test", test)):
        m = metrics(run_fvg_strategy(seg, chosen[0], chosen[1]))
        if m["n"] == 0:
            print("%s: no setups" % name)
            continue
        print("%s: n=%d win=%.0f%% avg_win=%.2fR avg_loss=%.2fR expectancy=%.3fR PF=%.2f maxDD=%.2fR"
              % (name, m["n"], 100 * m["win_rate"], m["avg_win_r"], m["avg_loss_r"],
                 m["expectancy_r"], m["profit_factor"], m["max_dd_r"]))

    print("\nFill-depth hypothesis test (whole sample at 0.15xATR, where micro-gaps exist):")
    pairs = collect_fvg_results(bars, 0.15, chosen[1])
    partial = metrics([res for (s, res) in pairs if s.fill < 1.0])
    full = metrics([res for (s, res) in pairs if s.fill >= 1.0])
    print("partial fills (<100%%): n=%d expectancy=%.3fR" % (partial["n"], partial.get("expectancy_r", 0.0)))
    print("full fills   (>=100%%): n=%d expectancy=%.3fR" % (full["n"], full.get("expectancy_r", 0.0)))
    print("(Synthetic data proves the harness runs; it cannot establish an edge.)")


def main() -> None:
    mode = sys.argv[1] if len(sys.argv) > 1 else "examples"
    if mode == "examples":
        verify_worked_cases()
        print_worked_cases()
    elif mode == "validate":
        walk_forward_report(synthetic_bars(3000, seed=7))
    elif mode == "csv" and len(sys.argv) > 2:
        bars = load_mt5_csv(sys.argv[2])
        print("Loaded %d bars from %s" % (len(bars), sys.argv[2]))
        walk_forward_report(bars)
    else:
        print(__doc__)


if __name__ == "__main__":
    main()
12. Failure Modes Specific to FVG Trading
Drawing gaps without the inequality. "It looks like a gap" is how traders end up buying ordinary congestion. The definition is one inequality — candle 1 high below candle 3 low — and it is either true or false on every chart. If the bands overlap, there is no gap, no matter how fast the move felt.
Trading micro-gaps. A 3-pip gap on a 1-pip spread is a coin flip with a tax. The 0.25×ATR floor exists because the sensitivity grid shows what happens below it: the loose rows carry negative expectancy in testing. The 4.0-pip gap in Case 3 that would have worked is the exception that proves the need for the rule — you cannot trade the exceptions, only the distribution.
Wick-invalidation leniency. Allowing gaps to survive deep wicks sounds generous and tests badly: the deeper the wick without a close-through, the closer the stop sits to the entry, and the more the statistics fill with trades whose stops are one spread wide. Our rule is close-through; the module keeps the lenient variant available for testing, not for trading.
Trusting fill-rate folklore. "Most gaps fill" and "gaps never fill" are both repeated constantly and both unverifiable as stated. What is measurable is your instrument's fill distribution — partial depths, full-fill frequency, and what happened after each — and the implementation prints exactly that. Numbers from screenshots are not data.
Ignoring the formation candle's role. The gap's lower edge is candle 1's high — a single price that defines the stop location. If candle 1 is a long-bodied bar whose high is far from its close, the stop distance grows and the position size shrinks; traders who "adjust" the stop upward to keep the lot size are deleting the structure the setup is built on.
Targets beyond the impulse. TP1 is the impulse high — a price that already printed. Reaching for TP3 as the base case (a full projection beyond it) is how a working pattern produces a losing curve: the runner is 20% of the position precisely so the projection can fail without killing the trade.
13. FAQ
What is a fair value gap?
An exact three-candle pattern: candle 1's high below candle 3's low with a green middle candle. The zone is the band between those two prices. No intent claims — the pattern is observable and testable.
What minimum gap size should a FVG have?
At least 0.25×ATR14 at candle 3 by default. The grid tests 0.15, 0.25 and 0.40; micro-gaps below the floor are spread food and test negative.
Partial vs full fill — which is better?
That is the article's falsifiable hypothesis: partial fills (<100% at trigger) should outperform full fills after costs. The implementation buckets every trade by fill fraction and reports both distributions — the boundary is half a pip wide in the worked case, so only a sample can settle it.
Where does the stop go?
Gap low minus max(2 pips, 0.15×ATR14). A close below the gap low kills the FVG permanently — close-through invalidation, not wick leniency.
Do fair value gaps always get filled?
No. Some fill immediately, some partially, some never. Any guide quoting a fill rate without a dataset is guessing; this article's code measures your instrument's actual fill distribution.
Can I automate FVG detection?
Yes — the implementation detects the gap, applies the size floor, tracks fills bar by bar, finds the trigger, computes stop and targets, and runs walk-forward validation with fill-bucket comparison on your exported CSV.
Continue the Series
- Pullback Trading Strategy — The Complete Guide (pillar)
- Fibonacci Pullback Strategy — Exact Rules and Three Worked Cases
- Order Block Pullback Entry — Displacement Thresholds
- EMA Pullback Strategy — Exact Rules and Money Management
- All Pullback Guides
Trade Structure With Live Tools
Zones, structure breaks and liquidity levels across 50+ symbols — the concepts in this series, computed live on your charts.
Go from article to implementation
Read the proof, then test the idea with calculators, free tools, case studies and a fixed-price build path.
Go deeper before you build, download or automate
Hand-picked engineering articles, indicator breakdowns and trading-system tools so visitors keep exploring instead of leaving after one page.
Pine Script to MT4/MT5 Conversion Planner
Analyze Pine strategies, repainting risk, TradingView alert bridges, MTF synchronization and the correct MQL4/MQL5 build path before paying for conversion.
Open planner
3-in-1 MT5 Indicator Bundle
12H Bias Engine, Smart Money Institutional Flow Dashboard and D1/H1 pending-signal logic with MQ5 + EX5 source included via Etsy.
MT5 Bank Orders Institutional Flow Dashboard
Supply/demand zones, BOS/CHoCH, liquidity levels, FVG, equal highs/lows and confirmed trade-plan logic explained with EX5 download.
MT5 Asia London NY Liquidity Engine
Asia range, London raid and New York continuation/reversal planning with internal session backtest stats and entry/SL/TP dashboard.
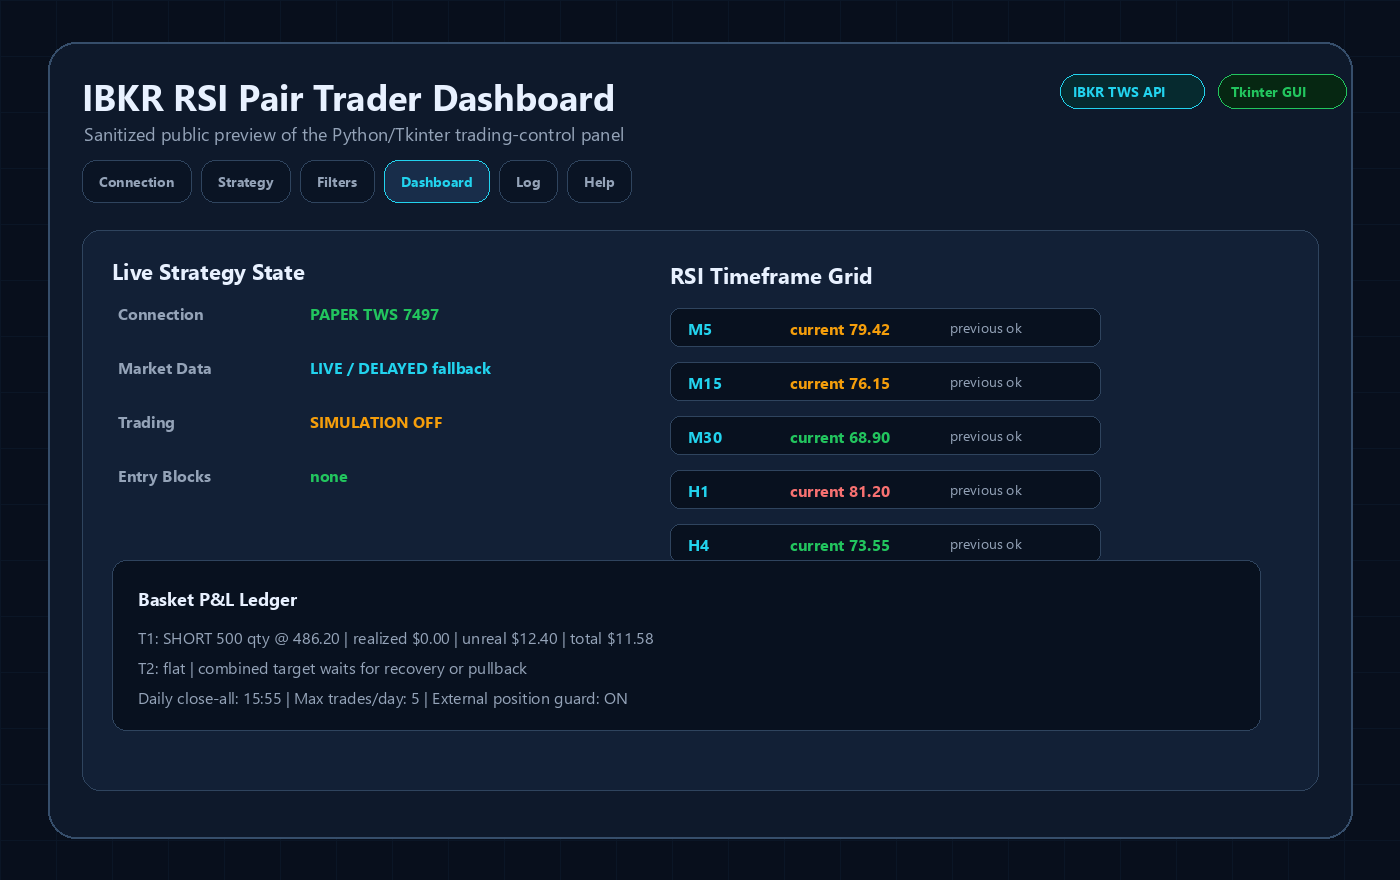
Interactive Brokers RSI Pair Trader
Tkinter desktop trading workflow, TWS API connection handling, RSI pair logic, risk controls and custom IBKR development positioning.
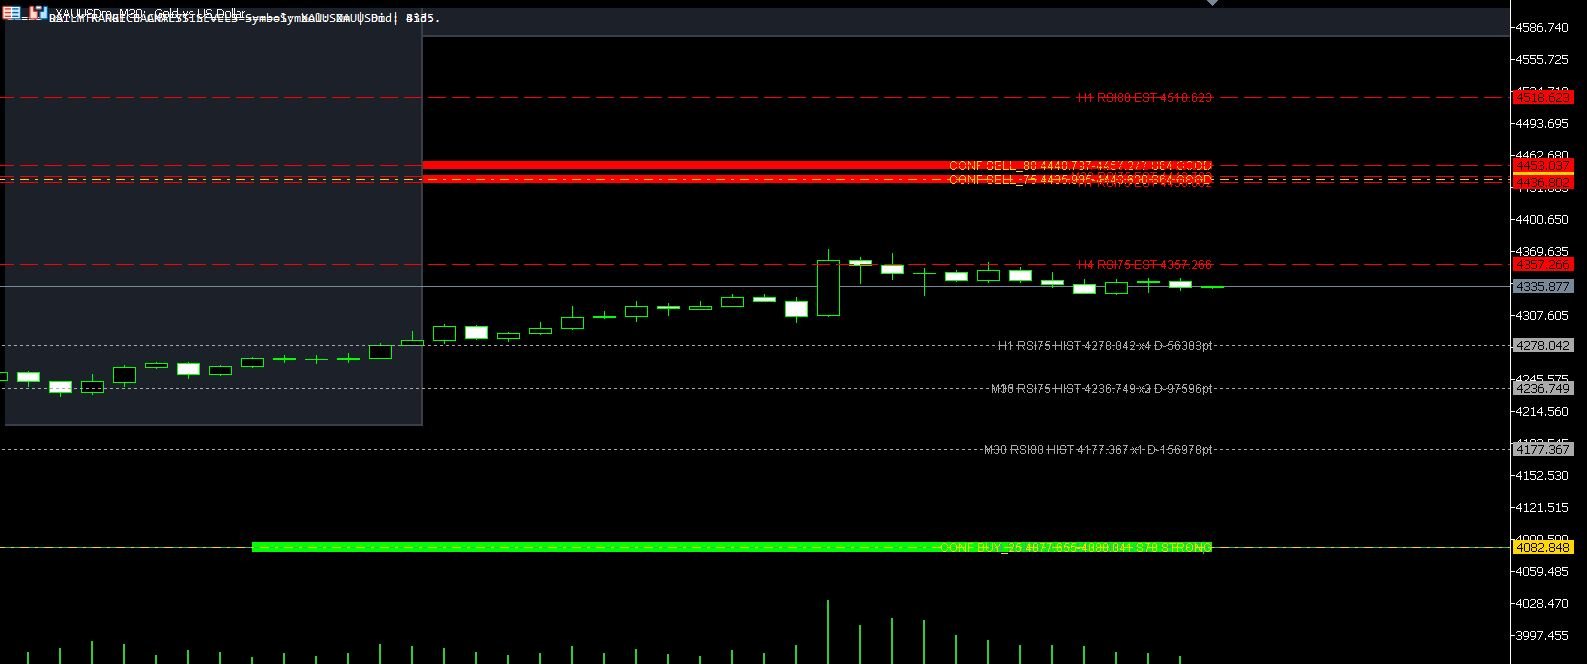
XAUUSD M30 CSV Data For Backtesting
Use clean MT5 historical data for Python backtests, strategy validation, spread checks and realistic gold EA research workflows.